I begin with identity, not the border
For most puzzles I recommend finding edge pieces early. In an animal portrait, however, the face can be an even stronger anchor. Eyes, nose, beak, mouth, and ears contain shapes that appear nowhere else in the image. Completing a small facial cluster gives me orientation and a meaningful centre from which to expand.
I still collect the straight outer edges, but I do not insist on finishing the entire frame before touching the animal. A clear eye fragment is too informative to leave in a general pile.
My first scan therefore has two goals: identify facial landmarks and separate pieces that cross the animal’s outer contour. Those contour pieces show both the subject and the background, making them valuable connectors.
I assemble the face through symmetry and asymmetry
Animal faces often appear roughly symmetrical, but lighting, pose, and camera angle create important differences. I use symmetry to predict the general arrangement while using asymmetry to decide which side a fragment belongs to.
In Red Fox, the eyes, ears, dark nose, orange coat, and white facial markings form distinct groups. I begin with the nose and eyes, then connect the bridge of the muzzle and the inner edges of the ears. The direction of the fox’s gaze helps orient nearby pieces.
For Cute Cat, whiskers and eye highlights are useful, but they can be delicate. I compare the direction of each whisker and the colour immediately behind it. A pale curved line over dark fur is different from the same line crossing a lighter cheek.
Brave Lion includes stronger transitions between eyes, muzzle, mane, and background. I build the central face before the mane because the face has more precise landmarks. Once it is stable, fur direction shows how the mane radiates outward.
I do not assume the left and right eyes are interchangeable. Reflections, eyelid shape, surrounding shadow, and head angle usually distinguish them.
I read fur as directional texture
Sorting every brown or grey fur piece together creates a difficult pile. Fur has flow. It may run vertically down a chest, curve around a cheek, radiate through a mane, or lie horizontally along a back.
I hold the complete image in mind and ask which body surface could produce that direction. Long fur and short fur also behave differently. A fluffy edge creates a broken contour, while short coat texture follows the underlying form more closely.
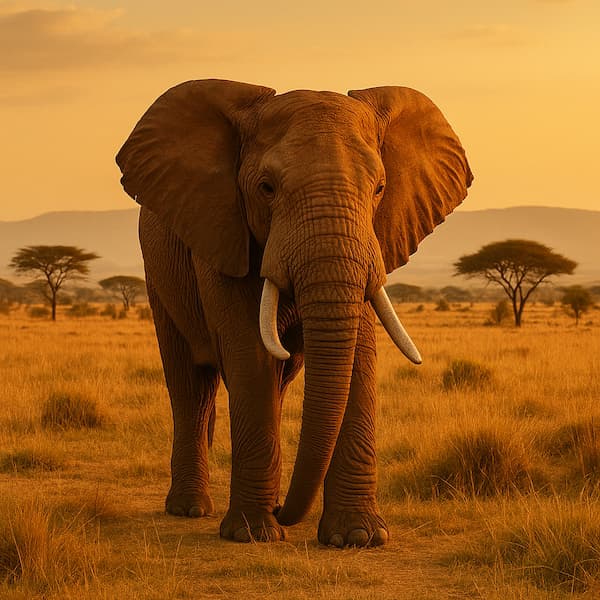
In African Elephant, the skin is not fur, but the same directional principle applies. Wrinkles change around the eye, trunk, ear, and legs. Broad ear texture differs from the trunk’s curved ridges. I separate anatomical regions instead of making one grey pile.
For Baby Elephant, scale and softer features help identify the face, but background colours may be similar to the skin. Pieces containing both the body edge and surrounding scene become essential.
Shadow can make one animal contain several colour families. I sort illuminated fur separately from deep shadow even when both belong to the same body.
I use the body outline as a second border
An animal outline behaves like an interior frame. It divides two textures: coat against meadow, feathers against foliage, or skin against sky. I place these transition pieces early because they define the subject’s size and pose.
In River Kingfisher, the beak and the line between bird and background can establish orientation quickly. The long beak is a directional pointer. Once I place the head and body outline, repeated blues or greens have fewer possible locations.
For a four-legged animal, I look for the back line, chest, legs, and ground contact. The point where a foot meets grass or earth provides both anatomy and location in the scene.
I pay attention to negative space around ears, legs, and tails. A small triangle of sky between an ear and the frame may be more distinctive than the fur beside it.
The outline also prevents proportions from drifting. Without it, I can build correct local clusters that sit too far apart. Connecting those clusters through the body contour reveals the intended scale.
I solve feathers by layer and colour direction
Feathers often contain bright colours, but colour alone is not enough. Feathers overlap in layers and point in consistent directions across the body.
Tropical Parrot gives me three strong anchors: the eye, beak, and boundaries between major feather colours. I build the head first, then follow feather layers down the neck and body. I compare whether a coloured band curves with the body or cuts across it.
Small feather edges form repeated lines. I distinguish them by their angle, spacing, and neighbouring colour. A green feather beside yellow belongs to a different transition than green surrounded by blue.
In River Kingfisher, the bird may share blue tones with water or sky. Feather texture is sharper and follows the body, while background blue has a different pattern. Surface type matters as much as hue.
I leave large areas of uniform feather colour until the eye, wing boundary, tail direction, and outer contour are complete.
I separate the animal from its habitat carefully
Animal images often use natural camouflage. A fox can share orange and brown with grass. An elephant can resemble dry earth. A bird can repeat the greens and blues around it.
I classify texture before colour. Fur has fine directional marks. Grass creates narrow blades and irregular verticals. Soil is granular. Water forms reflections or horizontal movement. Leaves have recognizable edges and veins.
In Red Fox, white chest fur and dark facial detail are easier than the softer meeting point between orange coat and meadow. I use the clear regions first, then let them define where ambiguous edge fragments must go.
Background landmarks also deserve their own groups. A flower, branch, rock, or bright opening can anchor a region that would otherwise be repetitive. The animal may be the subject, but the habitat still contains structure.
I avoid assuming that every sharply focused piece belongs to the animal. A foreground leaf can be as detailed as an eye, so I check material and context.
I account for crop and pose
The game creates a square board from the source image. That means the visible composition may emphasize the central subject and remove some material from the sides. I solve the board I can see, not an imagined uncropped photograph.
Before starting, I inspect whether the whole animal is visible or whether the frame cuts through the body. A portrait cropped at the shoulders needs a different outline strategy from a full-body scene. If a tail or leg leaves the frame, I look for where that contour meets a straight outer edge.
Pose also changes texture direction. A turned head bends fur and facial markings. A wing viewed from the side creates layered diagonals. A trunk or beak points toward another area of the board and can act as a visual guide.
My animal-puzzle sequence
My usual order is:
- Collect straight edges and facial landmarks.
- Join eyes, nose or beak, mouth, and ear details.
- Group texture by anatomical region and direction.
- Build the animal’s outer contour against the background.
- Connect the face to chest, body, wings, or legs.
- Establish strong habitat landmarks.
- Finish repeated fur, feathers, grass, leaves, or shadow.
The central lesson is to replace broad labels with anatomical descriptions. "Orange piece" is weak evidence. "Short orange cheek fur curving toward a white muzzle" is much stronger. Animal puzzles reward careful observation because living forms have direction, structure, and recognizable relationships even when their colours repeat.